


Mercedes fog light replacement requires skill and precision for safety and performance. Involves removing old lights, inspecting for damage, installing new ones specific to the vehicle using specialized tools. Essential tools include socket wrenches, screwdrivers, pliers, utility knife, new fog light assembly, mounting hardware; body work may need frame straightening and fender repair tools. DIY or professional, gather necessary tools—bulb, compatible wrenches, screwdriver—park on a level surface, test lights after installation for optimal visibility during restoration.
Thinking about replacing your Mercedes fog lights? Understanding the process, tools needed, and efficient steps can make this task smoother. This guide will walk you through everything from disassembling your fog lights to installation, ensuring a swift job done right. We’ll break down the required tools and materials, making your Mercedes fog light replacement a breeze in no time.
- Understanding Mercedes Fog Light Replacement Process
- Tools and Materials Required for the Job
- Step-by-Step Guide to Efficient Replacement
Understanding Mercedes Fog Light Replacement Process
Understanding Mercedes Fog Light Replacement Process
Mercedes fog light replacement is a procedure that requires precision and expertise to ensure optimal performance and safety. It typically involves several steps, starting with the removal of the old fog lights, which are usually attached with screws or clips. Once removed, the damaged or faulty components are inspected, and new fog lights are installed according to the vehicle’s specifications. This process demands a good understanding of Mercedes benz collision repair techniques, as mistaking similar-looking parts can compromise the effectiveness of the replacement.
At a reputable body shop offering mercedes benz collision repair services, technicians utilize specialized tools to carefully disassemble the lighting system without causing further damage. They then replace the faulty fog lights with new, compatible ones, ensuring a seamless fit and proper alignment. This attention to detail is crucial for maintaining the vehicle’s overall performance and aesthetic appeal, making it an essential step in any collision repair process involving fog lights.
Tools and Materials Required for the Job

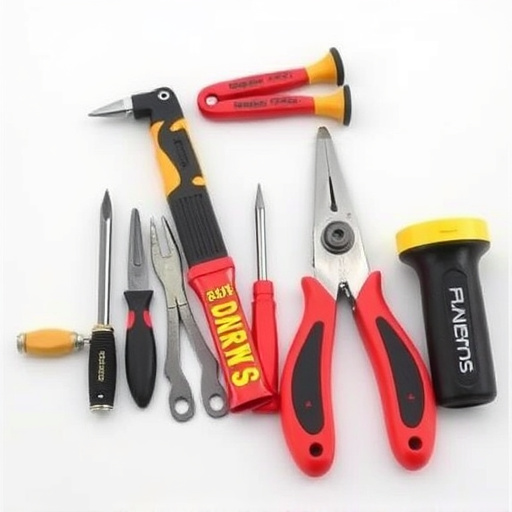
To successfully replace a Mercedes fog light, you’ll need to gather specific tools and materials. This job requires a set of standard automotive tools like socket wrenches, screwdrivers (both flathead and Phillips), pliers, and a utility knife for cutting through any adhesive or old seals. For the actual replacement itself, you’ll need a new fog light assembly compatible with your Mercedes model, along with any necessary brackets or mounting hardware. Depending on the age of your vehicle, a plastic welding kit might also be required, especially if there’s damage to the housing that needs repair beyond simple tightening or adhesive.
In addition, many auto collision centers recommend having access to a frame straightening machine and fender repair tools, though these aren’t strictly necessary for the fog light replacement itself. These tools are crucial if you’re also addressing any concurrent body work, such as bent frames or damaged fenders, which might accompany a fog light issue due to an accident or collision. Having these resources on hand ensures a more comprehensive and precise job.
Step-by-Step Guide to Efficient Replacement

Replacing a Mercedes fog light is a task that many car enthusiasts and even professional automotive repair technicians can accomplish with the right tools and a step-by-step guide. Here’s a simplified, efficient approach to the Mercedes fog light replacement process, tailored for both DIYers and those seeking guidance at a mercedes benz collision repair shop.
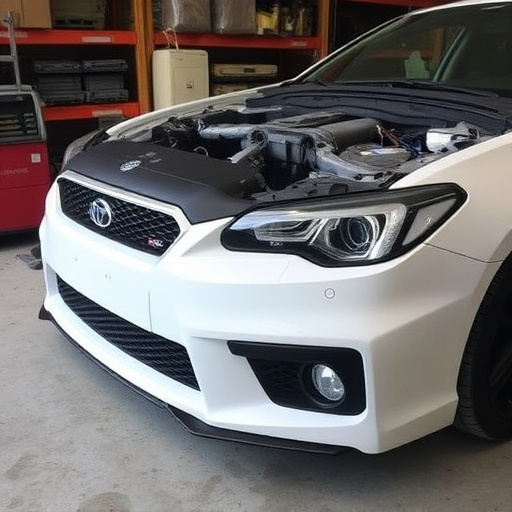
First, gather your tools: a new fog light bulb, a set of wrenches compatible with your Mercedes model, and possibly a screwdriver. Park your vehicle on a level surface for safety. Next, locate the fog lights—they’re typically positioned near the front bumper or fenders. Using the appropriate wrench, loosen the bolts securing the old fog light in place, taking note of their positioning for proper reinstallation. Remove the faulty bulb and replace it with the new one, ensuring a secure fit. Reattach the bolts in the same configuration as before. Verify that all connections are tight and your Mercedes fog lights function optimally by testing them after the car restoration process.
Replacing a Mercedes fog light is a straightforward process that can be completed in just a few hours with the right tools and materials. By understanding the steps involved, you can efficiently navigate the Mercedes fog light replacement job, ensuring your vehicle’s enhanced visibility during low-visibility conditions. With this guide, you’re equipped to tackle the task confidently, keeping your Mercedes safe and illuminated on the road.